Midjourney is the best text-to-image artificial intelligence model ever created thus far. At the time of writing this article, the latest version of this model is Midjourney v5. This AI image-generation tool became insanely popular since it was released to the public.
One of the things that contributed to its popularity is the fact that it was designed to generate images in a Discord server. This led to users observing what other people were generating so they could get inspired by each other.
The fact you can see what ideas different users have is enough to spark your creativity and start experimenting with the model in various ways from the moment you enter the Midjourney Discord server.
Despite it having the most popular Discord server of all time and millions of users, I know that some people still aren't familiar with Midjourney. Or they heard about it but never used it. That's why today I'm going to teach you some basics about this text-to-image model and give you prompt examples so you can have fun with it.
I want to mention that this is the first of many Midjourney articles that I'll write and publish on this website. There are so many things to cover regarding this AI model, so I'll carefully divide the content among several interesting topics.
What Is Midjourney?
Midjourney is a text-to-image model that was created by an independent research lab based in San Francisco called Midjourney, Inc. The main founder behind this model is David Holz, a successful serial entrepreneur.
Despite Midjourney becoming incredibly popular in its open beta phase, the company behind it hasn't spent any money on marketing. This was done intentionally since they're still trying to secure all the computing power they need to ensure their service works flawlessly.
The first four versions of Midjourney were all released in 2022. The fifth version became available on 16 March 2023 and has shown a significant improvement over the previous iteration.
How to Sign Up for Midjourney?
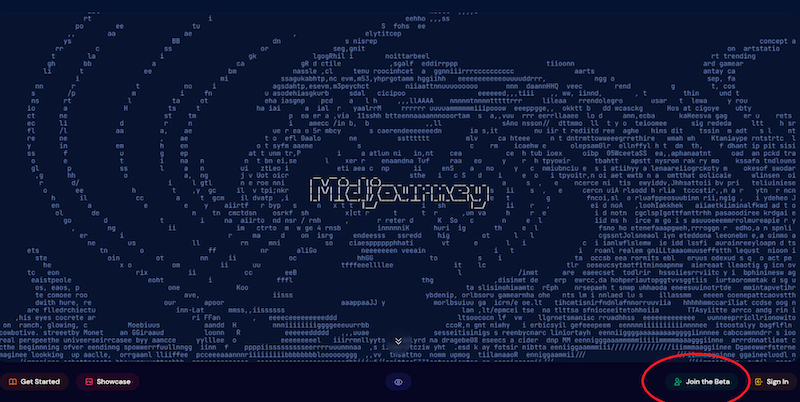
If you visit the official Midjourney website, you will see a "Join the Beta" button in the bottom right corner of the homepage. When you click on this button, you will be invited to join the Midjourney Discord server.
In case you don't have a Discord account, you'll be able to create one in a minute or two. There are plans to enable image generation on the Midjourney website but even then I think it would be more fun to create your images on Discord. There's truly something special about prompting this AI tool in a server filled with other enthusiasts.
When you navigate to the Discord server, you'll see a bunch of different channels on the left. To start using this text-to-image model, you should go to one of the 'newbie' channels.
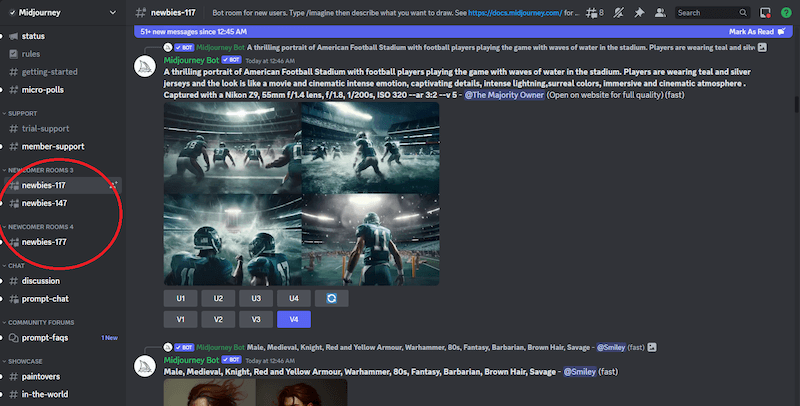
When you enter one of the newbie channels, you'll see what other people are prompting. To have the model generate something for you, you'll need to start your message with "/imagine". So, let's say that I wanted to generate an image of an elephant in the style of a 1920s black and white cartoon. To do this, I'd type the following prompt:
/imagine an image of an elephant in the style of an 1920s black and white cartoon
Here is the image Midjourney generated for this prompt.
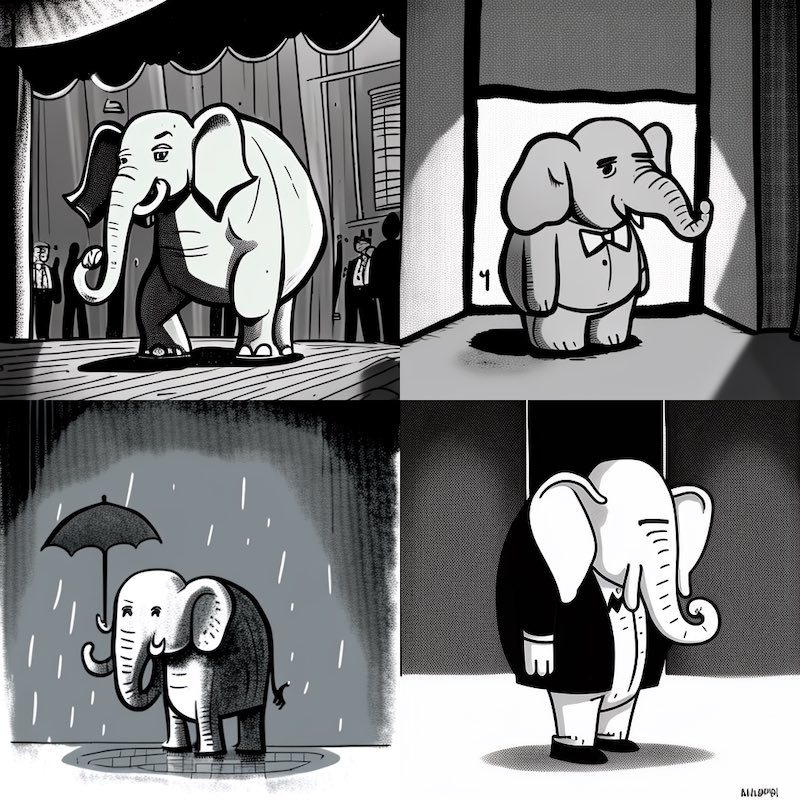
Midjourney generates four variations of an image. You will have the option to pick which one you want to upscale. When you select which image you want upscaled, it will separate it from the remaining three and improve the resolution. You can also request additional variations to be done on one of the four images presented to you.
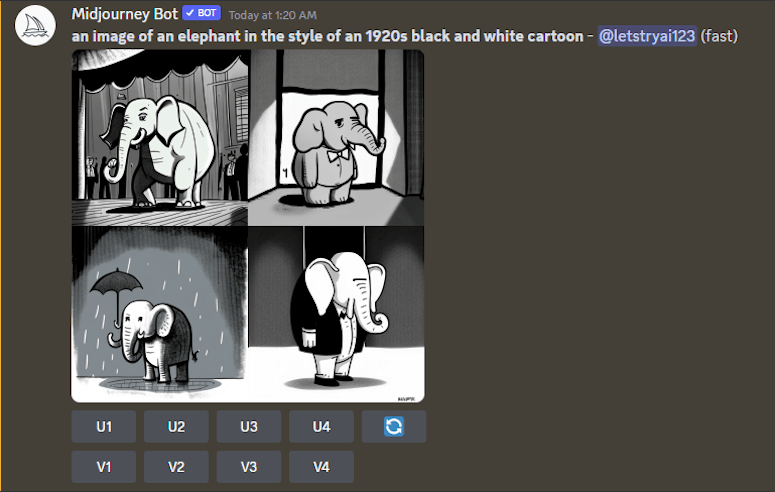
The commands you see right under the image are the ones you can use to either upscale a certain image or request additional versions of it. If you want to upscale a certain image, you should press UX, with X being the number of the image you want to upscale. Requesting additional variations involves pressing one of the buttons that start with V.
The Basics of Midjourney Prompting
Now that you know how to generate an image in Midjourney, I want to talk about the parameters that are available to users. Parameters in this context represent an option that you can use to alter the way an image will be generated. You will find yourself using a lot of different combinations of parameters to generate the image you want.
Before we get into the parameters you can use, I want to mention that I think the best way to approach learning Midjourney prompting is by taking it one step at a time. Experiment with parameters one by one until you learn how they will affect the output. With that being said, let's start with the easiest but incredibly useful parameter - aspect ratio.
How to Change the Aspect Ratio in Midjourney?
When you generate something in Midjourney, it will give you a square image by default. The aspect ratio will be 1:1 unless you use a parameter to change it. The parameter for changing the aspect ratio of an image is "--ar x:y".
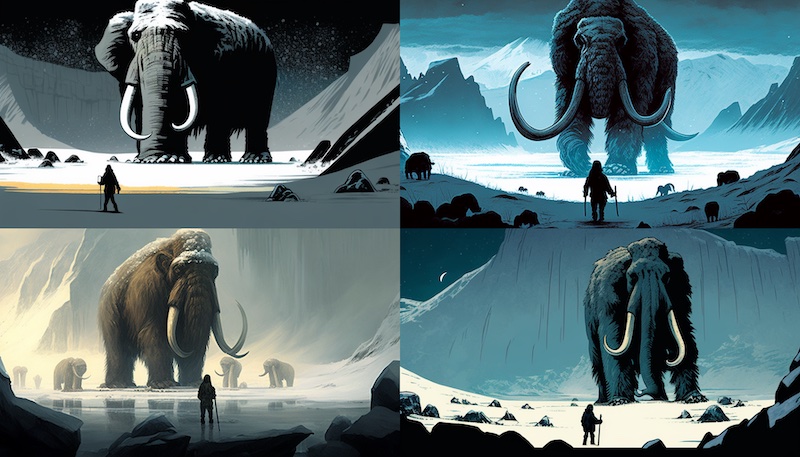
To use it, you will have to include it in your prompt. Let's say that we want to generate an image of a fictitious arctic landscape with huge, scary yetis hunting mammoths with an aspect ratio of 16:9. To do this, you'd have to write the following prompt:
/imagine a comic book style image of a fictitious arctic landscape in which huge, scary yetis are hunting down mammoths --ar 16:9
Here's the image the model generated.
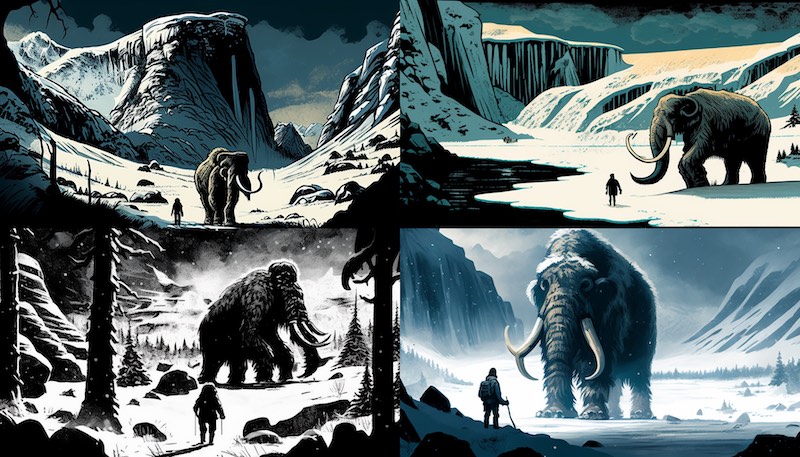
I want to mention that Midjourney won't always work as perfectly as you'd expect it to. To get your desired result, you should tweak your prompts slightly. Here, we can see that the model didn't generate multiple yetis, nor does the lone yeti in each image necessarily look like it's hunting a mammoth.
Nonetheless, it created four awesome images with a 16:9 aspect ratio. I also want to mention how good of a job it did with generating images in a comic book style.
What Is Chaos in Midjourney?
One of the most popular parameters used in Midjourney is chaos. This is a parameter that determines how varied the results of your prompt will be. Chaos in Midjourney is defined with a number between 0 and 100.
Let's say you have an idea for an image you want to be generated. If you want to get more reliable results, then you should set the chaos parameter to a lower value.
On the other hand, if you want to truly experiment with the output you can set the chaos parameter to a high value. Doing this will yield more unexpected and unusual results.
I will show you how the chaos parameter works in an example. I came up with the following prompt.
/imagine 1980s retro style illustration ad of a smartphone-like device, vivid colors, retro, retro colors, vector --ar 16:9
When I set the chaos parameter to 0, I had to change the prompt so that it would look like this:
1980s retro style illustration ad of a smartphone-like device, vivid colors, retro, retro colors, vector --chaos 0 --ar 16:9
Here are the results I got for this prompt.
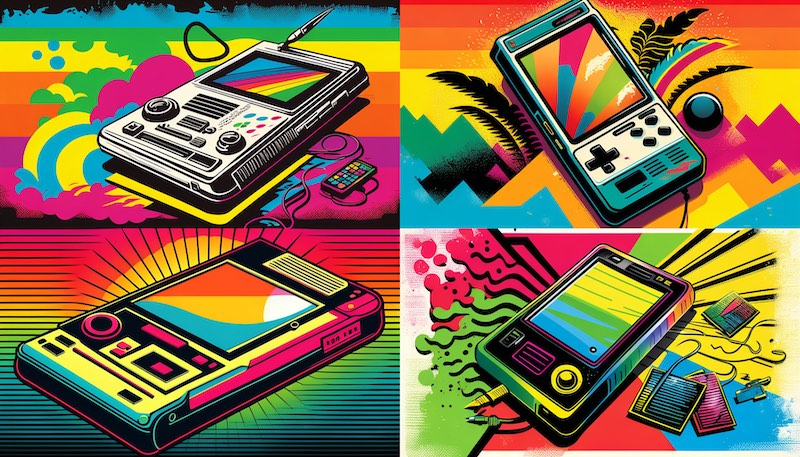
These are excellent images and ones I wouldn't at all mind using if I wanted to create a retro-style ad for something. But what would it look like if I wanted the AI model to increase the chaos parameter and generate something weird and unexpected? To test it, I entered the following prompt.
1980s retro style illustration ad of a smartphone-like device, vivid colors, retro, retro colors, vector --chaos 100 --ar 16:9
Here is the result I got.
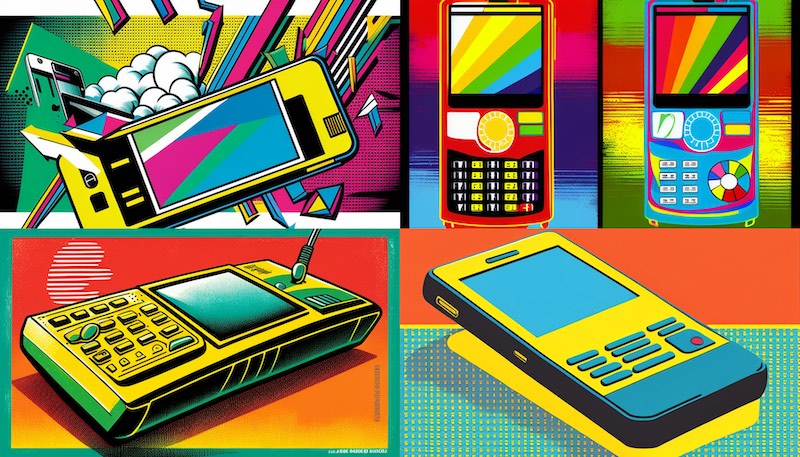
You can see how different these two sets of images are when you change a parameter like chaos. These are truly different results that look quite unusual.
Albeit, I changed it from the lowest possible value to the highest value. But I did that only to show you this example. In reality, it would be much better to slightly change the chaos value. Instead of it being centered, you can change it by 10-20 points to get some awesome results.
How to Use Seeds in Midjourney?
Creating consistent images in Midjourney may seem impossible if you're new to using this AI text-to-image model. That's because there's always a certain randomness to how the model generates images.
If you were to enter a prompt instructing Midjourney to generate an image of a smiling dog several times, you'd likely get different results in each instance. But if you use the seed parameter, you will actually be able to get consistent results.
You can think of seeds in Midjourney as numbers that are used to create a field of visual noise. The model uses them as a starting point to generate the initial grids of an image. If you want the generated images to be similar, you should define a seed number in your prompt.
You can define the seed number by adding "--seed" in your prompt along with a random number between 0 and 4294967295. The actual number is not important, you can write whichever one comes to your mind.
I think seeds are among the most important parameters in Midjourney, yet they aren't talked about enough. That's why I'll be dedicating a whole article to them soon. For the purpose of this introductory article to Midjourney, let's just say that you can add a random seed to your prompt.
For example, I wrote a simple prompt that goes like this:
/imagine a smiling dog --seed 273745
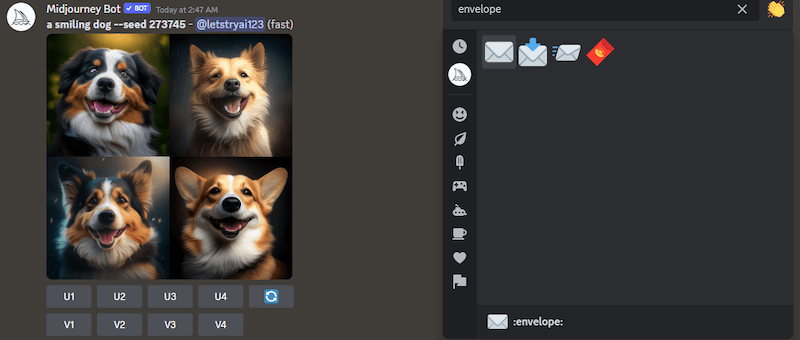
If you want to ensure that this seed is tied to the image (or if you want to check the seed of an image you didn't assign it to) you can click on the "Add Reaction" button for the message that includes the image and select the envelope emoji.
When you do this, the bot will respond with the seed value of the image.
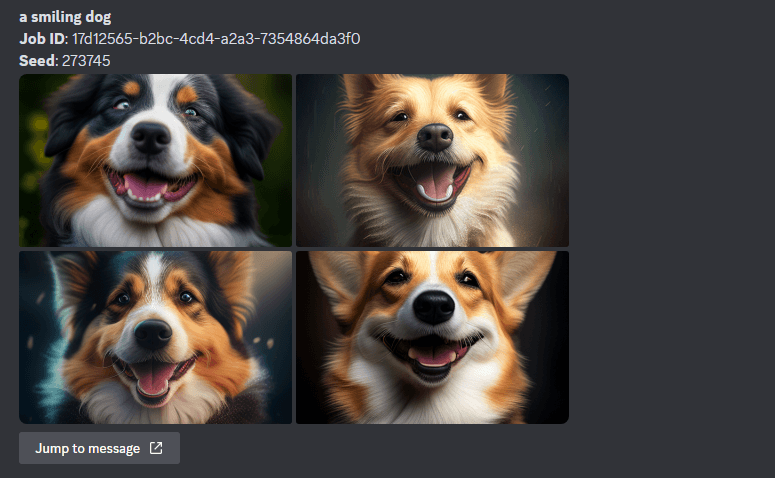
With the prompt above, I essentially assigned a seed value to an image. If I were to type the same prompt without this seed value, it would generate a very different image. In case I used the exact same prompt with this seed value, it would generate an almost identical image.
Why is this important?
Having a specified seed in your prompts will allow you to make changes to the base image by further improving your prompt instead of getting a completely different set of images.
Use the Stylize Parameter in Midjourney
The Midjourney text-to-image model was trained on a huge data set. It was trained on a huge number of images from the internet to learn how to generate results that favor artistic composition, forms, and color.
As the user, you are able to control how strongly you want this training to be applied when the model is generating images for you. You can use the stylize parameter to choose how much you want the result to be artistic.
The stylize parameter can be an integer value between 0 and 1000. If you want the output to match your prompt as much as possible without it being too artistic, you should choose a low stylization value. On the other hand, you should set a high value if you want the generated images to be more artistic.
Let's go back to that prompt I shared with you earlier on in the article that included a comic book style image of an arctic landscape with a mammoth. I'll use the same prompt but I'll set the stylize parameter to 1000 by writing it like this:
/imagine a comic book style image of a fictitious arctic landscape in which huge, scary yetis are hunting down mammoths --stylize 1000 --ar 16:9
Here is the result for this prompt.
As you can see, it's much more artistic and varied. The second and fourth images are especially notable in my opinion. Controlling the stylization parameter helped create images that make it seem like a human has drawn them.
I specifically chose this example to show you the effects of a high stylization parameter value since I think it works awesome when you want to generate images in the style of comic books.
Choose Which Version of Midjourney You're Using
At the time of writing this article, the default version of Midjourney is the fourth iteration. Although the fifth version is available, it still hasn't been set to be the default version because it's still in its alpha phase of testing.
This means that you will have to choose which version of Midjourney you're using. In my opinion, Midjourney version 5 is much better at creating images that look real. It's a huge improvement over the previous iteration.
I'll show you how the results can vary between the two versions with the following prompt.
/imagine a yellow bird flying through a purple sky
Midjourney version 4 generated the following images as a result.
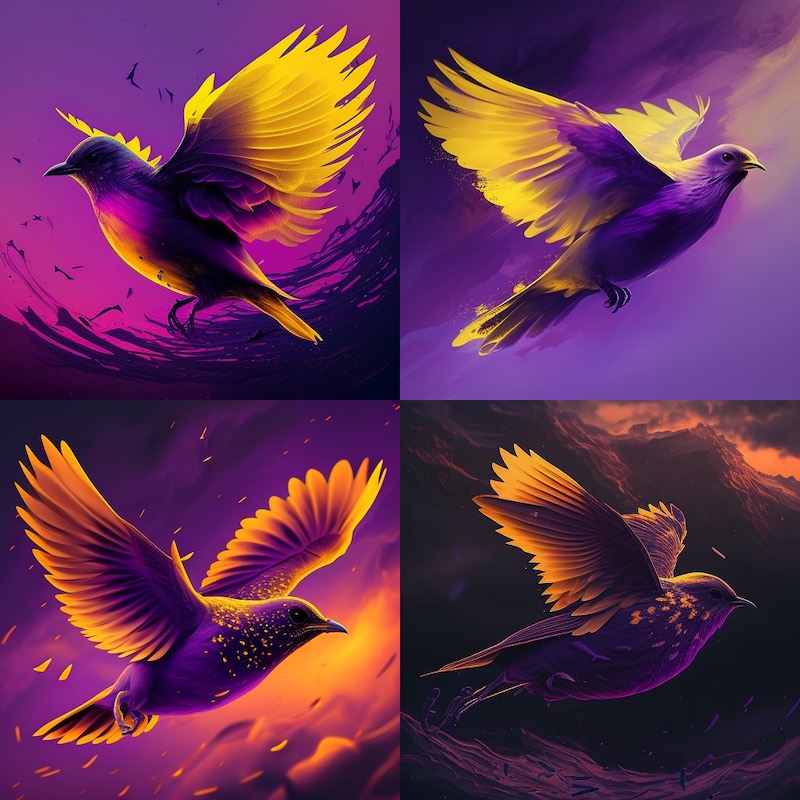
Although I wanted to see images of a yellow bird, it was mostly purple in all four instances. There are ways to get better results when you have a very specific prompt idea in mind, but we'll leave that for another article. Now let's see what the images look like when they are generated with version 5.
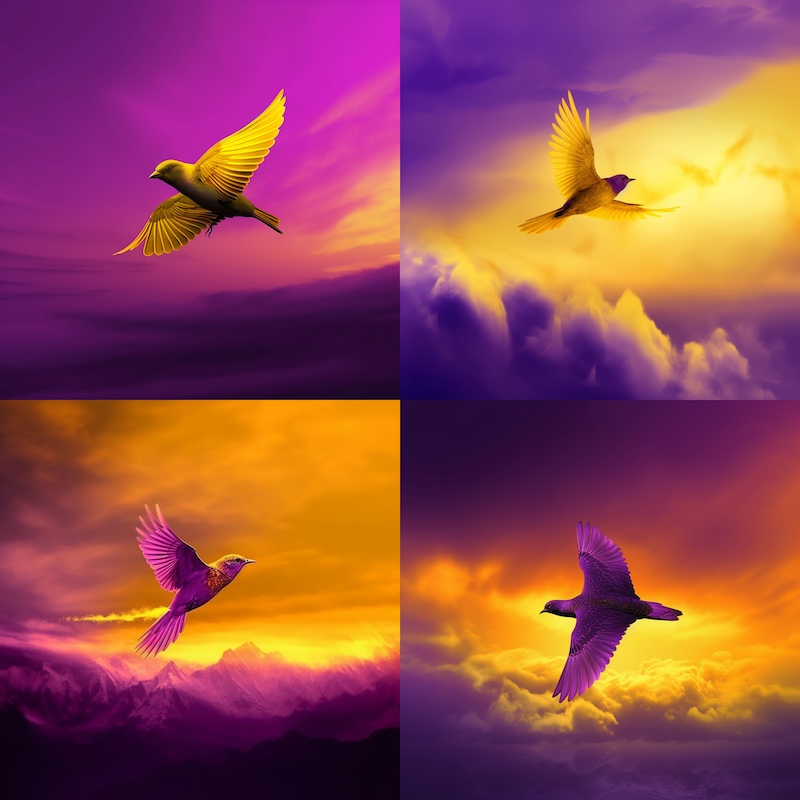
As I said, this version of Midjourney generates images that look more realistic by default. I also got two beautiful yellow birds. This set of images is more detailed and looks better overall.
When the Midjourney v5 becomes the default version, you will have to type "--v 4" in your prompt to generate images using the previous iteration of the model.
Final Thoughts
I tried to keep it as simple as possible in this introductory guide to Midjourney. I don't want you to feel overwhelmed after reading only one article, but believe me when I say that there's a lot more to discuss when it comes to using this AI text-to-image model.
I believe that what I've covered in this article is enough to get you started with Midjourney and hopefully spark your creativity enough that you test this model in various ways. Before you start learning more commands and techniques to create better images, you should first let your imagination run wild.
You now have the ability to see how an AI model will generate just about anything you can imagine. Whether you want to see the Mona Lisa transformed into Pikachu or look like it was painted by Basquiat, you can have the image generated in less than a minute.
Great start to my Midjourney training, I'm using you as my trainer. Look forward to learning and improving my skills.
By the way I'm 81 and starting a new hobby,trying to teach an old dog new tricks