Stable Diffusion is an AI-powered tool that enables users to transform plain text into images. It's one of the most widely used text-to-image AI models, and it offers many great benefits. For instance, you can use it for free. Another great thing is that you can run it locally.
Although AI enthusiasts have become used to the fact that you can now turn text into illustration and photorealistic images, it would've been difficult to predict that tools like this would gain popularity so quickly. If someone told me even three years ago that it would be possible to create images of this quality using only text, I wouldn't have believed them.
I have written many articles thus far in which I cover how to write a variety of prompts in Stable Diffusion. However, I decided to put together this complete guide that will help both beginners and experienced users easily find important information related to this AI model.
If you've been using Stable Diffusion for a while, you might want to skip the first few sections of the article. But if you've yet to start experimenting with this AI-powered tool, I think you'll find the first few sections incredibly useful.
What Is Stable Diffusion?
Stable Diffusion is a deep learning text-to-image model that was initially released in August 2022. It has since become one of the most popular models of its kind.
This tool was developed using diffusion models. This specific class of models is based on generating the probability distribution of a given dataset. I don't like to spend too much time talking about the tech side of these tools because that's not what my website is about. Instead, my goal is to show you how to interact with these models in the simplest way I can.
With that being said, let's talk about one of the main reasons why Stable Diffusion became so popular since it was first released.
While other text-to-image models like Midjourney and Dall-E made their tools accessible only through cloud services, Stable Diffusion has made it so that its model can run on most consumer hardware. Later on in the article, I'll talk about how you can run Stable Diffusion locally on your PC.
The most important thing to remember about Stable Diffusion is that it's a tool powered by artificial intelligence that you can use to create stunning images from basic text descriptions. What sets it apart from most other similar tools is that it can run locally on your PC.
Is Stable Diffusion Free?
You can use Stable Diffusion for free, but there are benefits when you subscribe to a payment plan. Before I break it down, I want to mention that I use the Clipdrop platform developed by Stability AI (the team behind Stable Diffusion) because it contains a lot of cool features that I'll talk about later on in the article.
If you've never used text-to-image models before or at least never tried Stable Diffusion, I suggest that you start by using the free version. Alternatively, you can install the program locally and run it for free. But I prefer the web version where I get access to great additional tools and don't clutter my PC with files.
Of course, you might prefer to have it run locally. I don't because I use this tool a lot. I sometimes make a thousand images in a day.
How Much Does Stable Diffusion XL Cost?
One of the things that I like about Stable Diffusion XL is that it's very affordable. Although I absolutely love Midjourney and am happy to pay any price for it, I have to say that a platform like Clipdrop gets you better value for your money.
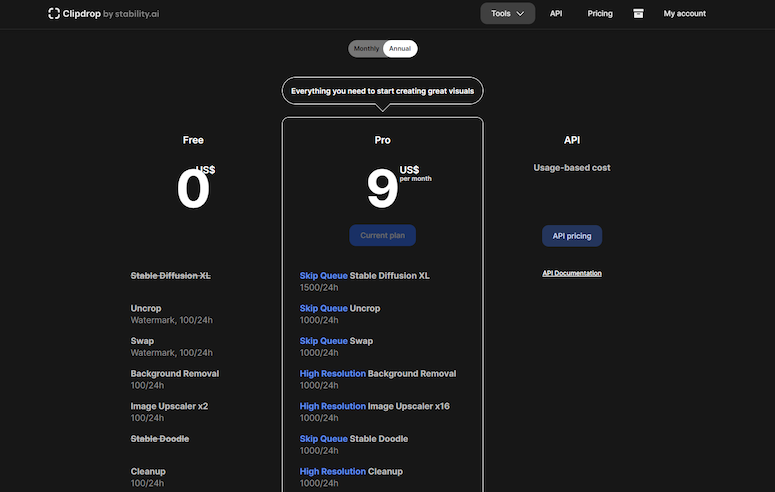
Here you can see the differences between using the model for free and subscribing to a payment plan. The primary reason why I don't use the free version is because I like to skip the queue and have the images generated in a matter of seconds. Of course, there are other benefits like access to other features of the highest quality possible.
The paid version is quite cheap compared to other popular text-to-image models. If you're on an annual plan, it will set you back only $9 per month. If you want to make payments on a monthly basis, access to the model will cost you $13 per month.
You can also pay for API access where the price is determined by your usage. This is excellent for developers, and I've already seen numerous examples of both teams and individuals making products by utilizing the Stable Diffusion API.
How to Subscribe to Stable Diffusion XL?
If you want to use the Clipdrop platform like me, it's very easy to subscribe to a payment plan. The first thing that you need to do is create an account on the website. Once you do that and log in, you'll notice a 'My Account' button in the upper right corner.
Click on the aforementioned button and it will take you to a Settings page for your account. Here, you'll have the option to manage your subscriptions, as you can see in the image below.
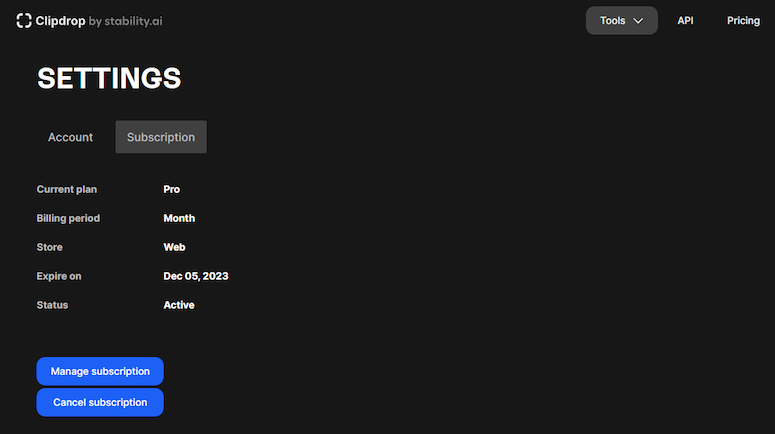
You pay for the service the same way you do any other type of online shopping. Simply enter your debit/credit card details and the payment will go through. You can cancel your subscription at any time.
How To Install Stable Diffusion Locally
Although the process may seem complicated if you've never done something similar before, it's quite easy to install Stable Diffusion locally on your PC. I have a quick guide on how to do this if you're interested in reading the step-by-step process.
In order to cover everything I want in this complete guide without making it extremely long, I'll share some of the basic steps that you'll need to do in order to get this AI model running on your computer.
There are two things that you'll need to do in the beginning. The first is to create a Github account. The second involves making an account on a website called Hugging Face. Once you complete these two steps, you should download Git for Windows, as well as Python.
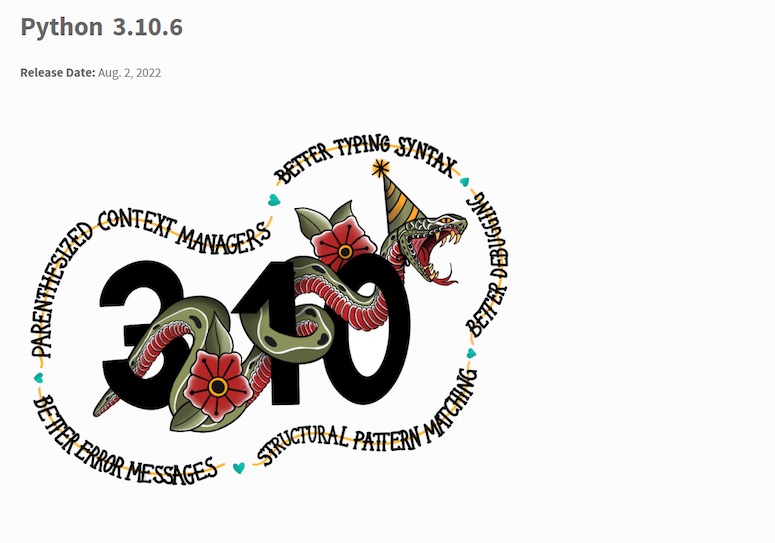
One important thing that I should point out is that it's best to download the 3.10.6 Python version instead of the latest version to avoid any issues that may arise during the installation process.
Another important step is to download the code for the Stable Diffusion Web UI on Github, as well as the newest version of the AI model. These are all requirements to get Stable Diffusion running locally. Like I said, I'm not going to share the whole installation guide here, but you can read it in the article I linked in the first paragraph of this section.
How to Use Stable Diffusion
The whole interface is incredibly intuitive. The most important thing you'll notice is a box where you can type text. When you type in anything that you want, the AI model will generate an image of it to the best of its abilities.
It's important to understand that these are powerful AI models that can "understand" more than you might expect if you've never interacted with text-to-image models before. When you press the 'Generate' button, the AI model will use the text you provided it to create an image.
Stable Diffusion will create an initial set of four images from your description. You can then generate additional sets of images until you find one that you like. If you see that the results are not exactly as you imagined them, you should try to tweak your prompts.
Even though the AI model is trained to pick up on natural language, it can sometimes get confused if you are not clear enough in your prompts. That's why often making small changes to a prompt can completely change the generated result.
How to Write Prompts for Stable Diffusion
Writing prompts for Stable Diffusion is so simple that anyone can do it. You simply write down what you want to see generated in an image, and the AI model will create it for you. However, it takes a lot of time and effort to master prompting skills and have your images truly stand out. And that's what I try to teach people how to do in my articles about text-to-image AI models.
One thing to keep in mind is that you have a 320-character limit for each prompt. I personally like to keep my prompts concise because I think that strategy provides consistent results. That's why most of my prompts are usually 140-180 characters long.
It's difficult to create an all-encompassing guide for writing prompts because there are many different strategies that you can use. That's why I'd rather share a strategy for a specific type of prompt.
Let's say that you wanted to create a photorealistic image of a gorgeous natural landscape. Here's how I would advise you to write a prompt that would yield great results:
- Start by instructing the model to create a photorealistic image. This is as simple as using the keyword 'photorealistic' in your prompt.
- Mention that the photo was taken by a specific camera. AI models are trained on an absurd amount of data, which is why specifying a certain camera model can have a tremendous impact on the generated result.
- Mention a specific focal length to get an even better result.
- Clearly describe what should be in the main focus of the image.
- Describe the background and include other information that may be important for the overall image (for instance, is it a sunny day or is it raining).
- Include additional keywords that will help the AI model understand what you're creating.
This may sound a bit confusing if you're new to this type of tech, but I promise you that you'll quickly get the hang of it. Let me share a prompt example I wrote using the strategy mentioned above, as well as what the AI model generated as a result.
prompt: photorealistic image taken with Canon EOS R5, 24mm lens, majestic waterfall in the middle of a winter wonderland, aurora borealis in the night sky, illumination
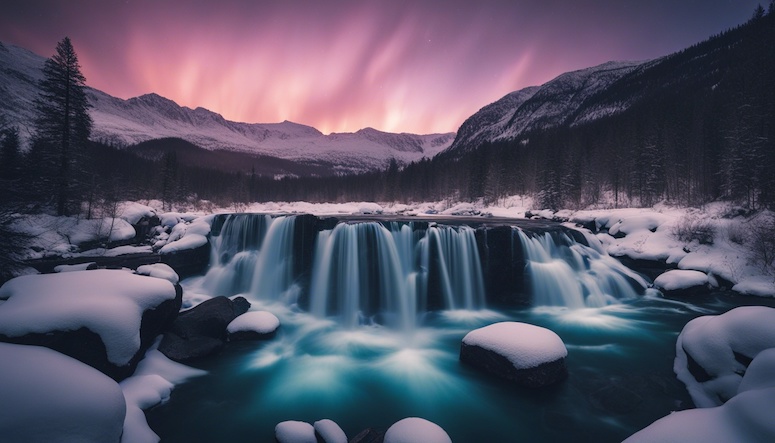
Wow! If I were to use an image upscaler now and add some finishing touches to this image, it would be pretty difficult to tell that it was generated by an AI model. If you like this image and want to see similar ones, I suggest that you check out my article on Stable Diffusion prompt examples for landscapes. It includes many more examples.
In fact, you can see hundreds of different Stable Diffusion prompt examples on this website. Simply navigate to the Stable Diffusion category and you'll be able to easily spark your creativity.
If you're a beginner, I suggest that you take some of my prompts and edit them to see how it will affect the generated results. This is a great way to learn how these models work in a practical way.
Advanced Options in Stable Diffusion
There are a few different advanced options that you can use in Stable Diffusion. You can access them by clicking on the square button that's to the left of the 'Generate' button. There are four different tabs that contain advanced options. These tabs include:
- Style
- Aspect ratio
- Negative prompt
- Version
I will create separate sections of the article for both preset styles and negative prompts since there's a lot to cover there. The version tab simply lets you pick which version of the AI model you want to use. Of course, I advise that you always use the latest version because that will provide you with the best results.
The aspect ratio tab lets you choose the dimension for the images you want to generate. There are seven different aspect ratios to choose from. The default option is the 1:1 aspect ratio, but you can also click on settings that will turn your images into portraits, landscapes, etc.
Now that we've covered that, it's time to see what type of preset styles are available for Stable Diffusion users.
Preset Styles in Stable Diffusion
There are different preset styles available in Stable Diffusion XL. Although you can choose the 'No Style' option and define a particular art style in your prompt, sometimes the easier and better choice is to use one of the available options. Let's say that you want to ensure that the generated image looks like a real photo. In this case, you should just use the 'Photorealistic' style.
I have an article in which I discuss the 32 best art styles in Stable Diffusion XL. In this article, I share prompt examples for every single preset style that you can find in Stable Diffusion XL. Make sure to check it out if you want to know what to expect when using these styles.
This guide is quite long so it's understandable if you don't want to be redirected to another article to see some prompt examples featuring the mentioned preset styles. So, you shouldn't worry because I will include some prompt examples right here and right now.
prompt: dark fantasy realm where evil creatures and demons reside, a lone warrior must face an army of demons to save the world, RPG art style, darkcore aesthetic, scary, hell
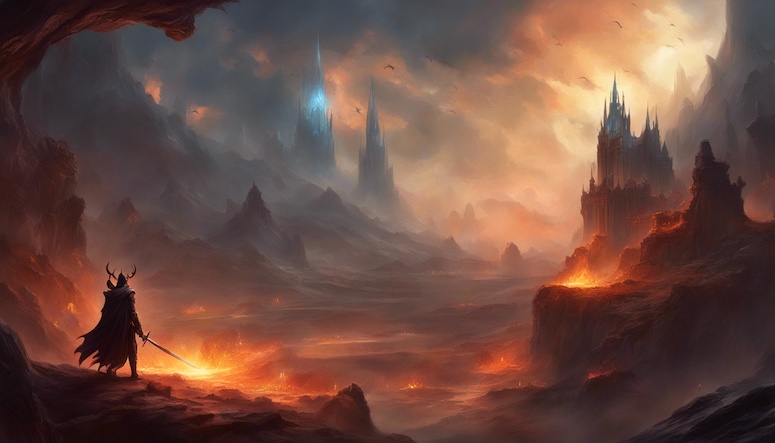
I created this image using the 'Fantasy' preset style. In my opinion, this is one of the best styles that you can choose in Stable Diffusion XL. I might be biased though since I grew up on RPGs set in fantasy worlds, so I really like to see images like this.
prompt: abstract art, the passage of time was never linear, time is a circle, consciousness explores time in all directions at once, the past present and future are all the same thing
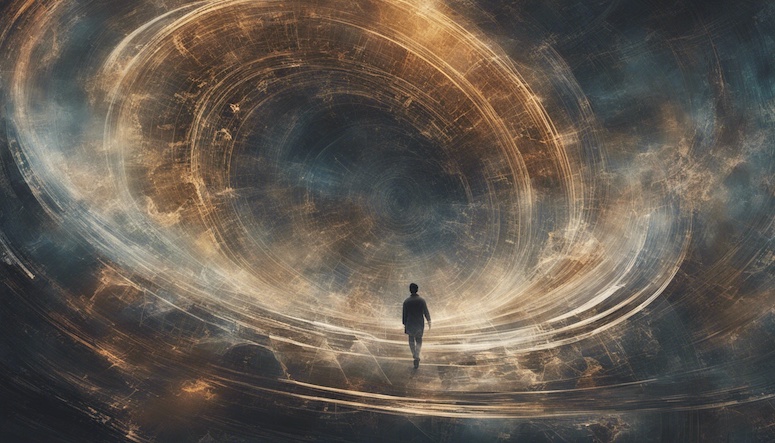
I used the 'Digital Art' style to generate this image. I love making abstract art using text-to-image models. There is something special about describing an abstract concept to an AI model and then seeing how it interprets the description.
prompt: fantasy style, the fountain of youth, a majestic fountain with magical properties that can keep a person young forever
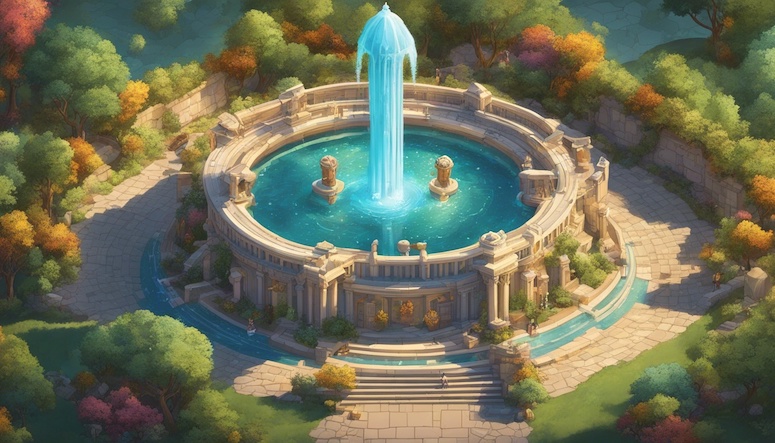
Even though you can pick only one preset style at a time, you have the option to mention one or more styles in your prompt. You often get amazing results by combining more than one style, as long as they're complimentary.
For the prompt above, I chose the 'Isometric' preset style, but also mentioned the fantasy style in my prompt. What I got from the model is a structure that could easily be used in a video game. I'm really impressed with this result.
Negative Prompting in Stable Diffusion
Negative prompting is extremely useful regardless of what type of image you're creating. Let's say that you wanted to create an image of a cheeseburger. Remember that the AI model doesn't necessarily understand what a cheeseburger is, it just sees an insanely high number of pictures of it and can thus generate it.
The thing about cheeseburgers is that they are usually served together with French fries. Because of this, there is a high chance that the AI model will generate an image that contains both a cheeseburger and French fries. But you don't want that; you only want to see an image of a cheeseburger.
That's where negative prompting comes into play. With this feature, you can write down any object that you don't want to see featured in the generated results. Simply by writing down what you want the AI model not to generate is a great way to ensure an image is just as you imagined it.
Advanced Tools in Clipdrop by Stability AI
Clipdrop comes equipped with a variety of advanced tools that you can use to take your images to the next level. For instance, there is Stable Diffusion Turbo, which provides users with real-time text-to-image generation. What this means is that you see how an image changes as you're writing the prompt.
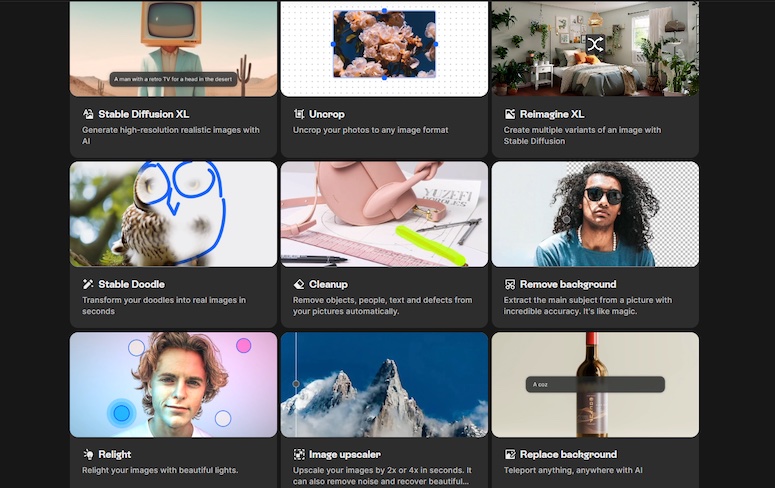
Sometimes, you want also to make slight edits to a generated image, and the tools available on Clipdrop can help you with that. I've talked with a lot of people who are really into writing prompts, and most of them (including myself) aren't skilled at using software like Photoshop. Thankfully, the advanced tools for this problem are incredibly easy to use.
Let's go through some of the most popular tools available on the Clipdrop platform:
- Uncrop - this tool enables users to uncrop their generated images to any format.
- Reimagine XL - if you want to create different variants of an image with Stable Diffusion, this is the tool you should use. You simply upload an image and the AI model will make different variations of it.
- Stable Doodle - this is really fun to use. You can draw a doodle quickly, add a short text description to it, and the AI model will turn it into a high-quality image.
- Remove Background - this one needs no explanation. If you want to remove a background on an image, use this tool. There is another option that enables you to replace a background.
- Image Upscaler - the dimensions of an image generated by Stable Diffusion are not really big. Thankfully, you can use an upscaler to significantly increase the dimensions of your image in a matter of seconds.
- Cleanup - people can often tell whether an image was generated by artificial intelligence because they usually find a small defect when they look closely. With the cleanup tool, you can remove defects, as well as any objects you want from an image.
As you can see, the Clipdrop platform comes equipped with a lot of useful tools that you can use to enhance your images. It's up to you to choose which combination of tools you'll use for each image.
One of my favorite tools is the image upscaler because I like to increase the quality of an image that I really like. Of course, I tend to use most of the tools available on this platform.
Create a Stable Diffusion Prompt Generator With ChatGPT
There may come a time when you'll feel like your inspiration for writing prompts is depleted. This is bound to happen sooner or later, especially if you're using a text-to-image model often. You simply run out of ideas for the short term, even though you want to continue writing prompts.
Many people have become familiar with ChatGPT over the last year. It has become incredibly popular, with both individuals and businesses using it for a variety of purposes. One of the best things about it is that you can use a version of the model for free. Of course, you can have access to a better version if you subscribe to a payment plan.
If you're searching for inspiration, ChatGPT might help you. You can teach this large language model your prompting style and have it generate new ideas for you. I have an article in which I share a guide on how to use ChatGPT to write Midjourney prompts.
Although the article you're reading now is focused solely on Stable Diffusion, the prompt writing process is essentially the same for both models. That's why you can check out the aforementioned article even if you're only using Stable Diffusion.
How to Upscale Stable Diffusion Images?
If you're using the Clipdrop platform for access to Stable Diffusion, then you can easily just scroll down and see the image upscaler tool developed by Stability AI. This is the easiest option to upscale your AI-generated images.
There are also other tools that you can use. For instance, I like a program called Upscayl, which is completely free and open source. You download it on your computer and use it as much as you want. There are no usage limits.
One of the main things I like about Upscayl is how fast it is. It's incredibly quick at upscaling images. Both of the tools I mentioned are excellent for increasing the dimensions of your images. It's up to you to decide which one you want to use.
Final Thoughts
What I've covered in this article is in my opinion all of the basic information that you should know about Stable Diffusion. Let's do a quick recap in case you scrolled through the article without reading it thoroughly since I know this is a long one.
Stable Diffusion is a text-to-image model powered by artificial intelligence that can create images from text. You simply type a short description (there is a 320-character limit) and the model transforms it into an image.
Each time you press the 'Generate' button, the AI model will generate a set of four different images. You can create as many images as you want from a single description. Sometimes, it takes generating 30-40 images to find the one that you truly like.
One of the best things about Stable Diffusion is that you can run it locally on your computer. I prefer the web-based app that stores images in the cloud, and I gladly pay for that service. I use the Clipdrop platform developed by Stability AI for access to the AI model.
Apart from the text-to-image model, the Clipdrop platform offers a set of advanced tools that you can use to edit and enhance your images. Some of the best tools include the image upscaler, background remover, and the cleanup tool.