If you've been participating in the Midjourney community on Discord for some time, you already know how many times users asked the team for an inpainting feature. This is without a doubt one of the most anticipated features to be released for this text-to-image model.
The wait is finally over.
The Midjourney team announced the inpainting feature on 21 August 2023, and after spending a few days playing around with it I decided to write this guide.
In this article, I'm going to talk about how you can effectively use the inpainting feature to make your images better. I'll also be sharing several prompt examples that I think you'll find quite helpful.
What Is Midjourney Inpainting?
The Midjourney inpainting feature is essentially a tool that can help you modify different parts of an image. Photoshop recently released a feature like this, which they refer to as generative fill. My brother wrote a great article on how to add objects to photos with Photoshop AI generative fill. If you want to learn more about that, I suggest you read the article.
I have compared numerous results that you get with the Photoshop generative fill tool and the Midjourney inpainting feature. I have come to the conclusion that the Midjourney tool provides much better results, but that's just my opinion.
When you're using Midjourney, you will notice this tool under the name Vary (Region).
Many have already started calling the Midjourney inpainting tool a game-changer, and I agree. It provides users with more control over different parts of an image. This is very exciting and makes me feel like I'm starting to learn how to prompt all over again.
I believe that the additional effort to add different objects to the initial image can truly take your work to the next level. I already see how many AI artists are having fun with this tool.
How to Use the Midjourney Inpainting Feature
What I really love about the Midjourney team is that whenever they release a new feature, they ensure that it's incredibly easy to use. Before I provide you with a step-by-step guide on how to use this inpainting tool, there are some tips that I feel the need to share.
The following tips were provided by one of the Midjourney team members:
- It's recommended to use the feature on large regions of the image. In essence, these regions should represent 20-50% of the image. You can also use it on smaller or larger regions, but you get the best results when you select a portion in the 20-50% region.
- You should make sure that the inpainting you're doing matches the original generated image to get the best results. For instance, you shouldn't expect to get perfect results if you add a giraffe swimming in the middle of the ocean.
- Users shouldn't expect this tool to be a magic fix. It's often recommended to do a Vary (Subtle) to get desired results.
Now that you've learned about the most important tips to consider when you're using the Midjourney inpainting feature, it's time to learn how to exactly use this tool. As I previously said, the process is simple.
Let's start with a very simple prompt that we'll use as some sort of blank canvas. I went with the following prompt.
/imagine photorealistic bland landscape --ar 16:9
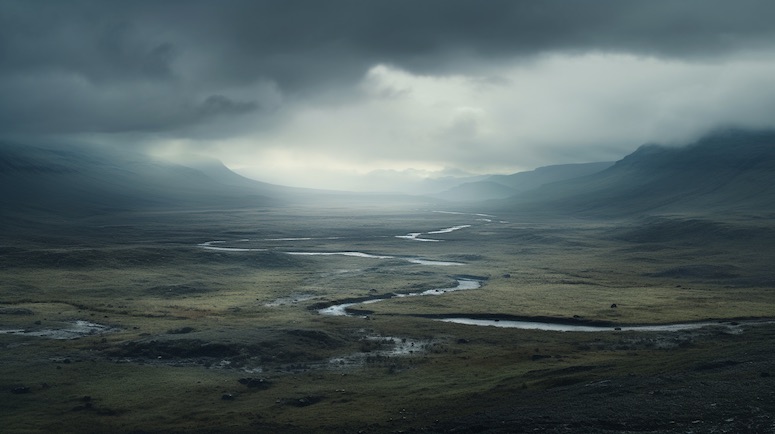
An image like this should literally be treated as a blank canvas when you're using the Midjourney inpainting feature. But this is only one way of using this tool, and it represents the easiest method to show you how inpainting actually works.
When you type in the prompt, the AI model will generate a set of four images. You will need to upscale one of them to use the inpainting tool. Once you upscale an image, you'll see the 'Vary (Region)' button, which is the inpainting feature.
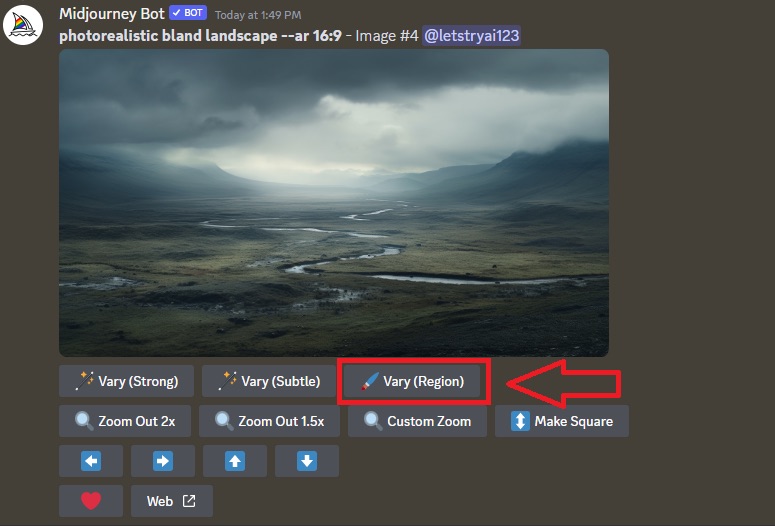
To use the inpainting tool, simply press on the 'Vary (Region)' button and you'll be taken to a window where you can select any portion of the image and write an additional prompt. This pop-up window is pictured in the image below.
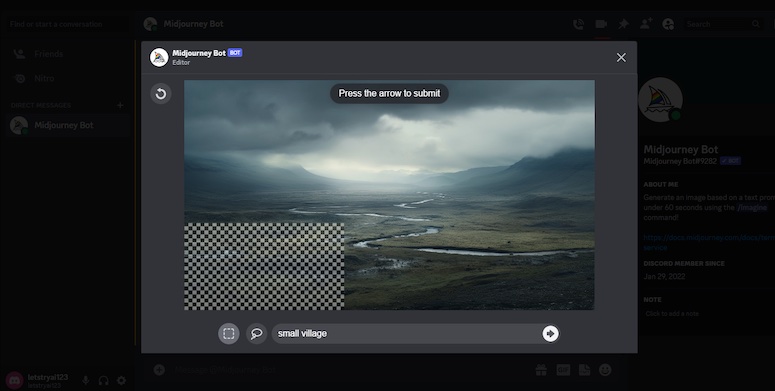
As you can see, I select a portion of the image that is less than 20% even though the Midjourney team mentioned you get the best results when you select a 20-50% region. Although it's useful to follow the tips they share, remember that you can always experiment and try out different techniques yourself.
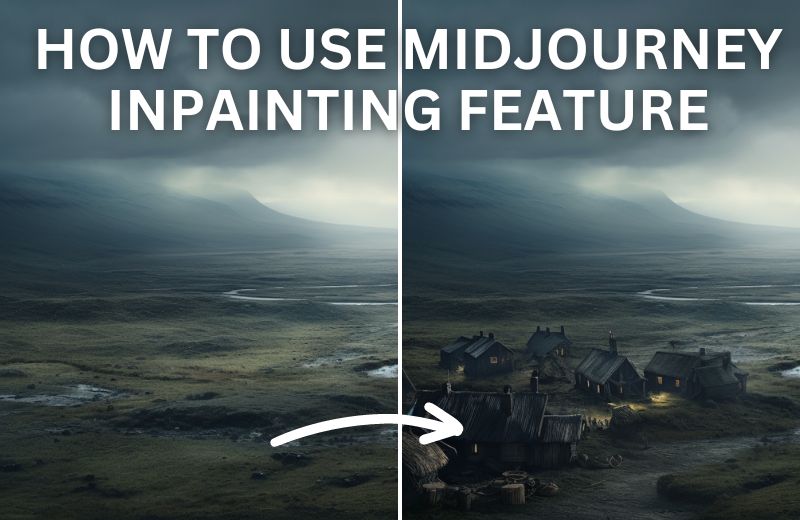
In this case, the inpainting tool worked great with the region I selected. I typed in 'small village' as the additional inpainting prompt because that's what I wanted to see in this section of the landscape. Here's the result.
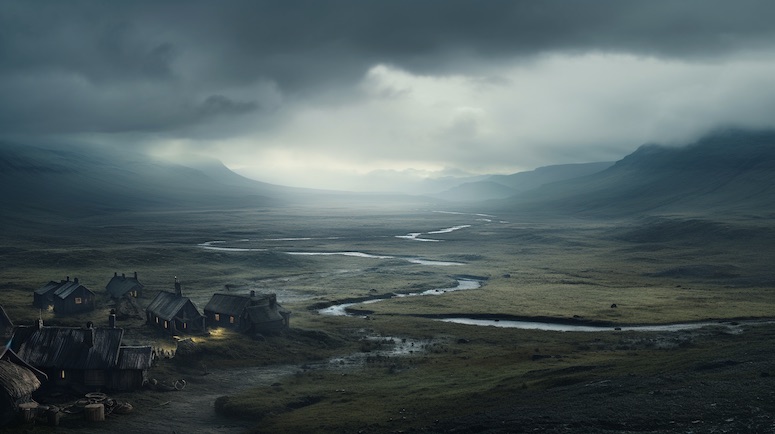
The result is not perfect since one or two of the houses look a bit off. But you wouldn't expect them to look perfect even if it was the base image, so it really has nothing to do with the quality of the inpainting feature.
Now that you've learned the basics of how to use the Midjourney inpainting tool, it's time for the best part of the article - prompt examples.
Midjourney Inpainting Prompt Examples
The great thing about the Midjourney inpainting feature is that it enables users to use it multiple times on a single image. In other words, you can remove or add multiple objects to an image.
If you're not sure how to remove a certain object from an image, I'll show you in the prompt example below. I wrote a simple prompt, which goes like this:
/imagine UFO is flying over the middle of a corn field, the ufo features a strange shape and has caused the night sky to light up --ar 16:9
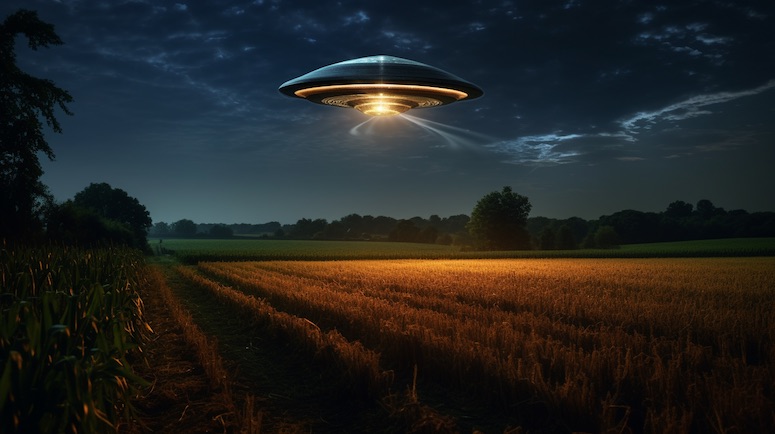
This image turned out great, but now that I look at it I kind of wish that I didn't include the UFO object. Thanks to the inpainting tool, I can now easily remove it.
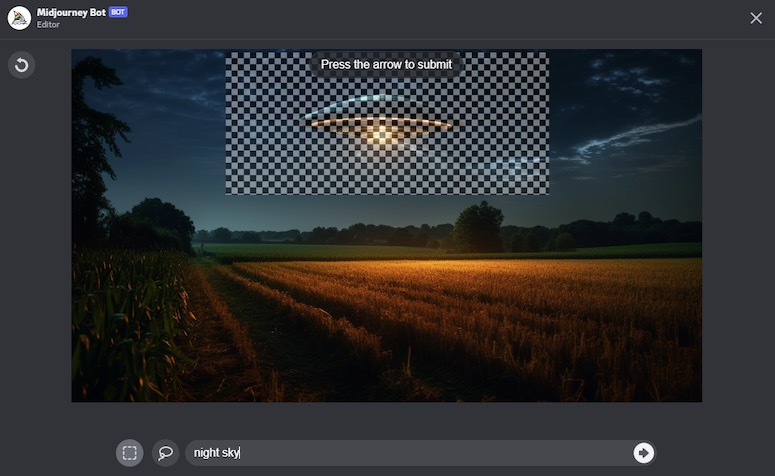
All I have to do is press the 'Vary (Region)' button and a pop-up window will appear. I can now select the area that contains the UFO and write a prompt that matches the background. In this case, I simply wrote 'night sky' and pressed enter.
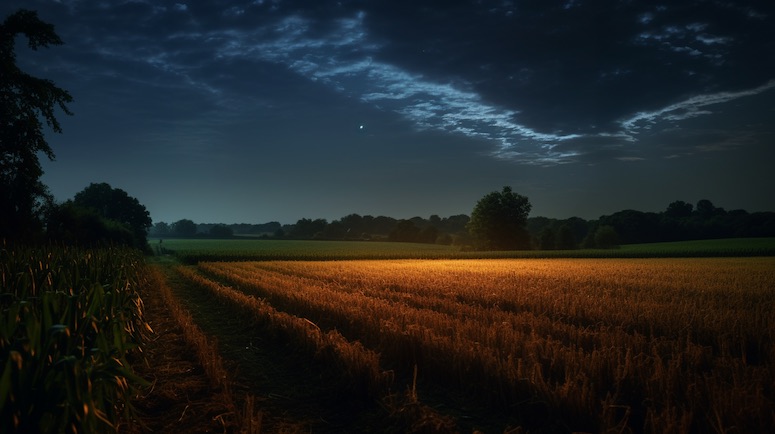
Voila, the UFO is gone and you couldn't even tell that there was an object there in the first place. I could add other objects in the sky at this point, but I'd rather show what this feature can do on other prompt examples.
For the following prompt example, I wanted to select a larger portion of an image and see the results that turned up. This is the base prompt I wrote:
/imagine distant view of an empty landscape, medieval fantasy aesthetic --ar 16:9
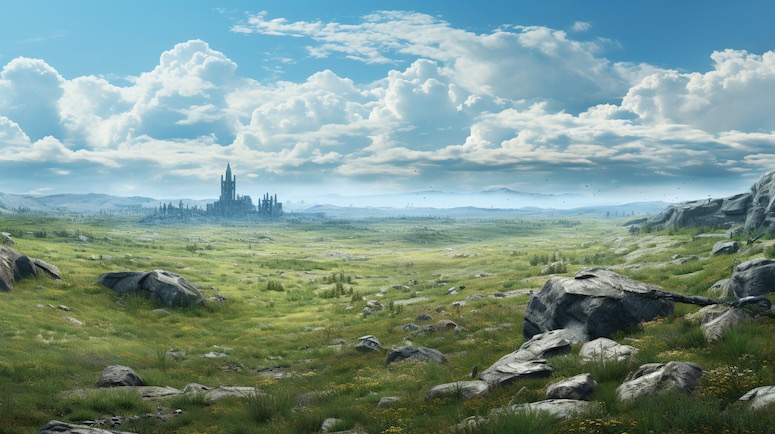
I know I've been using the same aspect ratio for each of the images in this article so far. I just want to mention that you can use any aspect ratio, I just prefer 16:9 and think it looks great for images on the website, especially if you're viewing them on your desktop/laptop computer.
This is a great base image, and I purposefully mentioned that the landscape should be empty in my prompt. I feel like what's missing here is an army, so that's what I'm going to add.
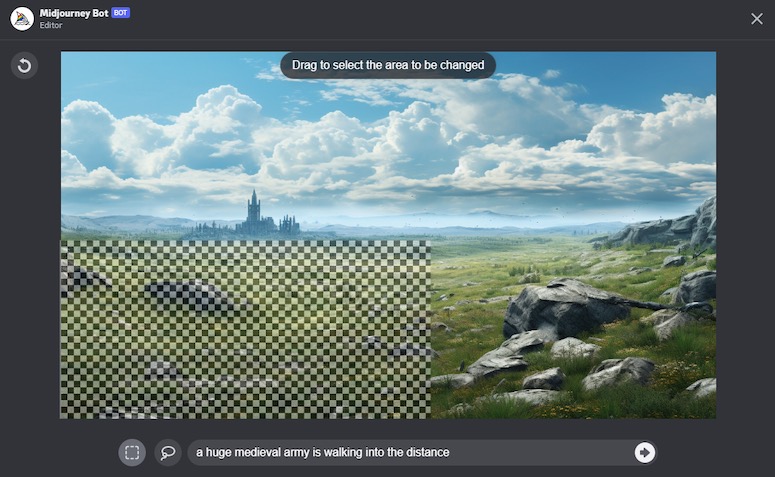
I chose the inpainting tool after upscaling the image and wrote the following prompt - a huge medieval army is walking into the distance. Here's one of the results I got from this prompt.
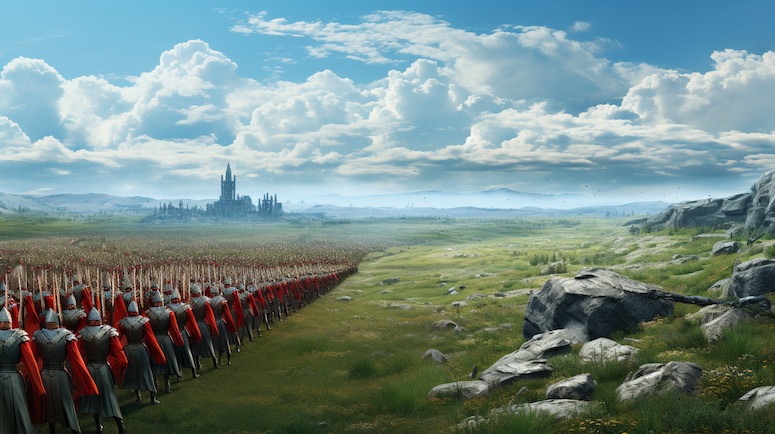
It turned out extremely well, especially since it often happens that when Midjourney has to generate a large number of objects that are virtually the same it can give you some unexpected and weird results.
I want to keep all of the prompt examples simple in this article but will write a more advanced guide in the near future. With that being said, I'll leave you with one more prompt example before finishing this article.
This time, I want to show you how you can create great fashion designs with the inpainting tool. This is a technique I saw many people playing around with these days. Let's start by generating a portrait of a person.
/imagine photorealistic image taken with Canon EOS 5, close-up shot of a beautiful young woman standing in the middle of a busy street wearing a blank black t-shirt --ar 3:4
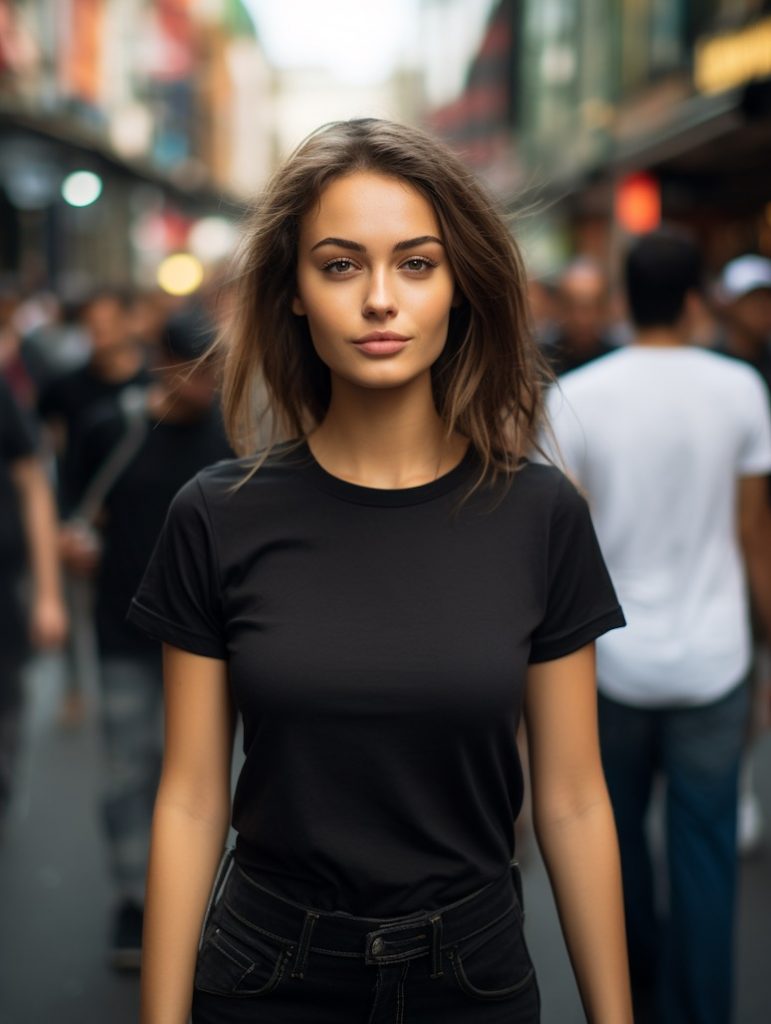
This is kind of the default type of prompt that I write whenever I want to generate a photorealistic image. If you want to learn more tips about how to generate cool photorealistic images, I suggest that you read my article on Midjourney prompts for realism. That's where you can find a lot more information on this topic.
Anyway, let's get back to the topic at hand. Now that I have this image, I can create a design for the black t-shirt using the Midjourney inpainting tool. I wrote the following prompt for the shirt design - pictorial logo of a multi-colored phoenix for a modern fashion brand, simple, flat design.
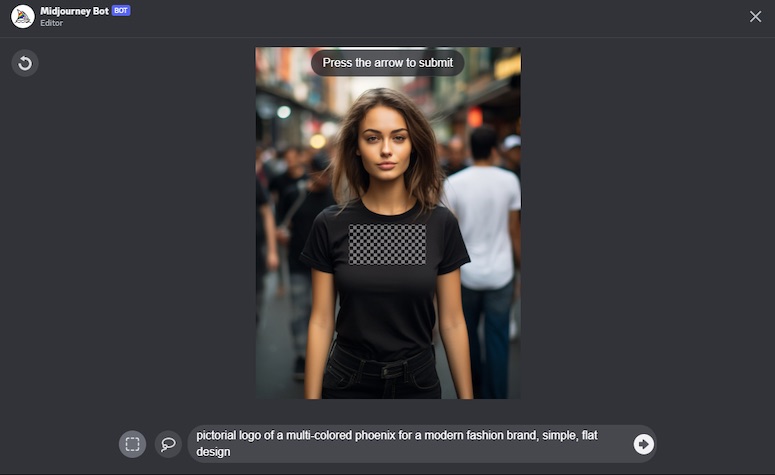
This is such a small region of the image that it might take you a few tries to get the inpainting to work. Luckily, the following result came up on the first try and I liked it so it worked out well for me here.
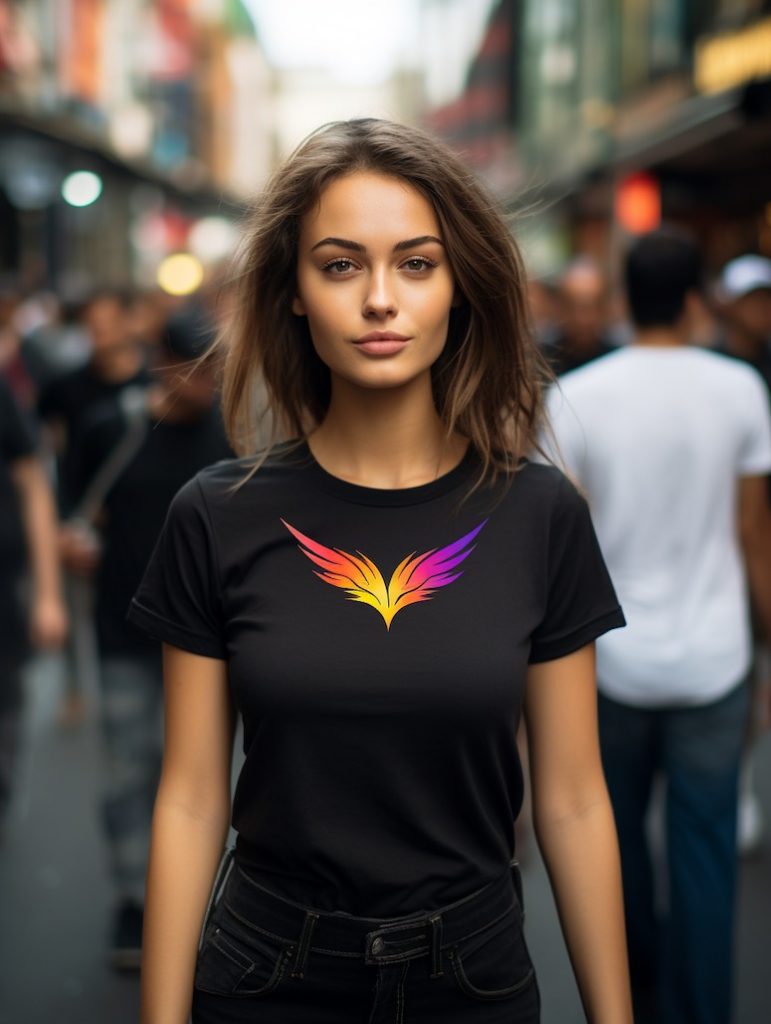
I selected only a small portion of the shirt, but you can select the whole thing and apply a certain design. For instance, you could write that you want the shirt to feature a floral print. You can also change the color of the shirt, and modify other parts of the image (i.e. change the hair color).
Is Midjourney Inpainting Good?
It's difficult to satisfy a user base with a feature they've been expecting for a really long time. Expectations get really high over time, which results in disappointment if the feature is not as good as people hoped it would be.
What's amazing is that the Midjourney team has yet to disappoint users with their new features. They take the time to ensure each tool they release works great before it's made available.
The Midjourney inpainting feature provides users with a lot more control over each image they generate. If they see parts of the images they don't like, they can easily remove them. They can also add numerous objects to an image.
You can basically select any region of an image and add objects, but the tool works best when you select a 20-50% portion of the image. Keep in mind that you'll be able to use this feature only after you've upscaled a certain image.
Would you say it is better than Stable Diffusion? For someone advancing to the next level of graphic design via AI?
Honestly, I feel like it's too early to tell. Midjourney does have some superior parameters, but both are excellent AI-powered tools. I would say that both are incredibly good and both are worth using. We'll see in due time which one turns out better in the long run 🙂